# Installation
Asking For Help
If you have any problems during the installation, create a new ISSUE or join Discord ALAS Dev. Link is in README.md.
Notice:
- Feel free to join Discord channel, ALAS Dev, but you have to react with TICK in rules channel to unlock all the channels. To avoid bot spam, you need to be a member for at least 5 minutes to speak.
# Easy Install Method
Easy installer is only available for Windows. Mac and Linux need to follow the manual installation tutorial.
# Download Installer
Get the latest easy installer on Github Releases (opens new window), but do not download source code in zip.
Unzip installer. Alas requires about 1.5 GB for full installation.
# Edit Installer Settings
Read the comments in config/deploy.yaml, and modify it according to yourself. This is considered as the use threshold of Alas.
For EN users, no need to modify, keep them as default.
# Use Installer
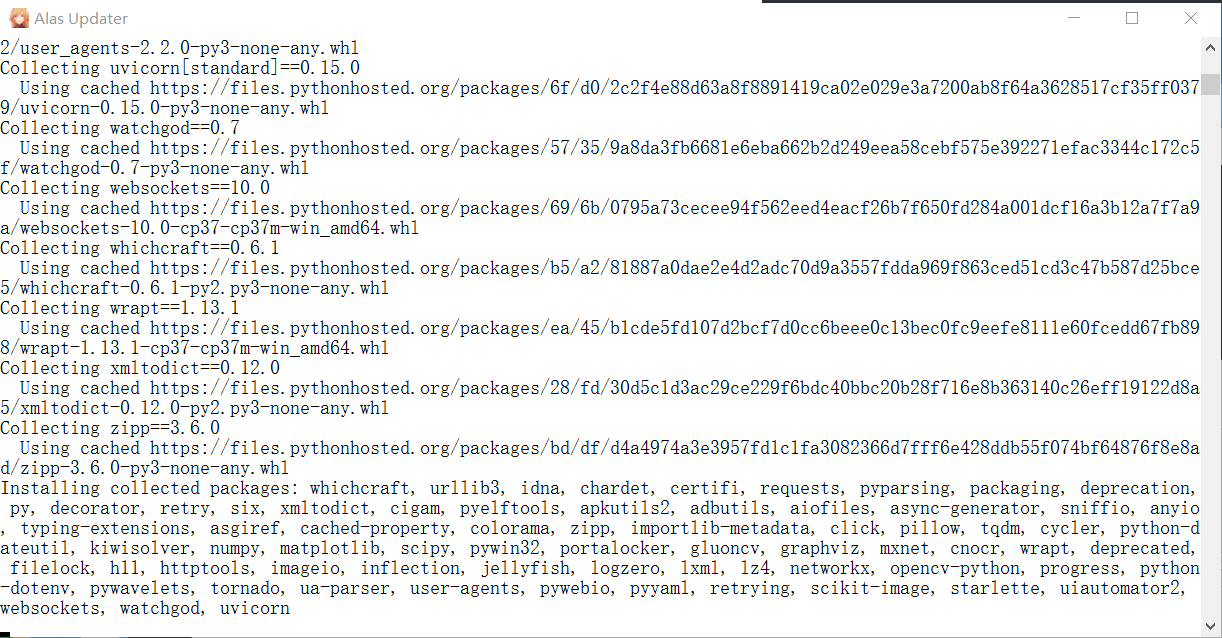
Double click to open Alas.exe. It will do staffs from pulling repositories, install environments, to preparing ADB. Wait A few minutes, Alas Desktop App will be opened.
If you encountered any trouble, check your deploy settings and re-open.
# Frequently Asked Questions (FAQ)
# My anti-virus software says Alas.exe is a virus
Add it to white list. Alas.exe is a bat file converted to exe file, might have false positives on some anti-virus software. If you are still worrying, replace
Alas.exewithdeploy/install/Alas.bat, which does the same thing.
# I have problems during the installation
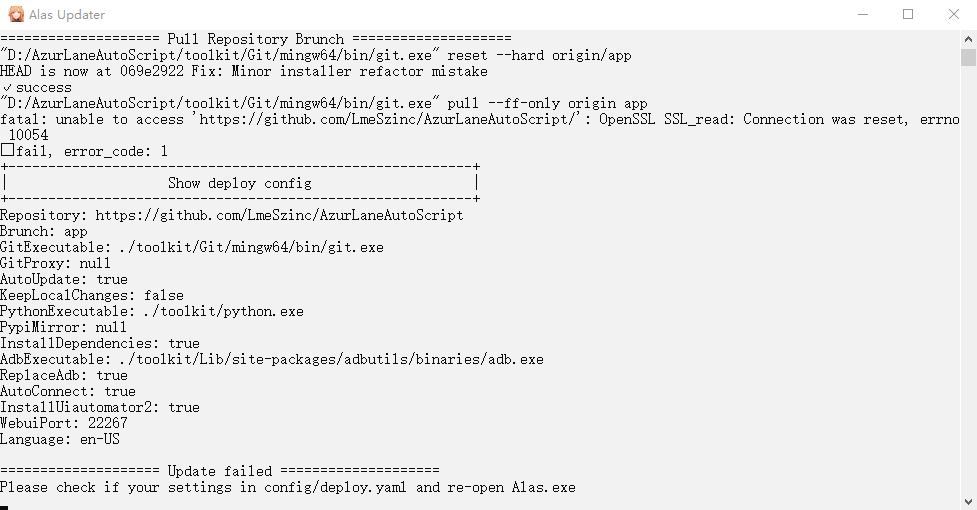
Just as the installer said, you need to check your settings in
config/deploy.yamland re-openAlas.exe. If you encountered network issues, just re-open to retry.
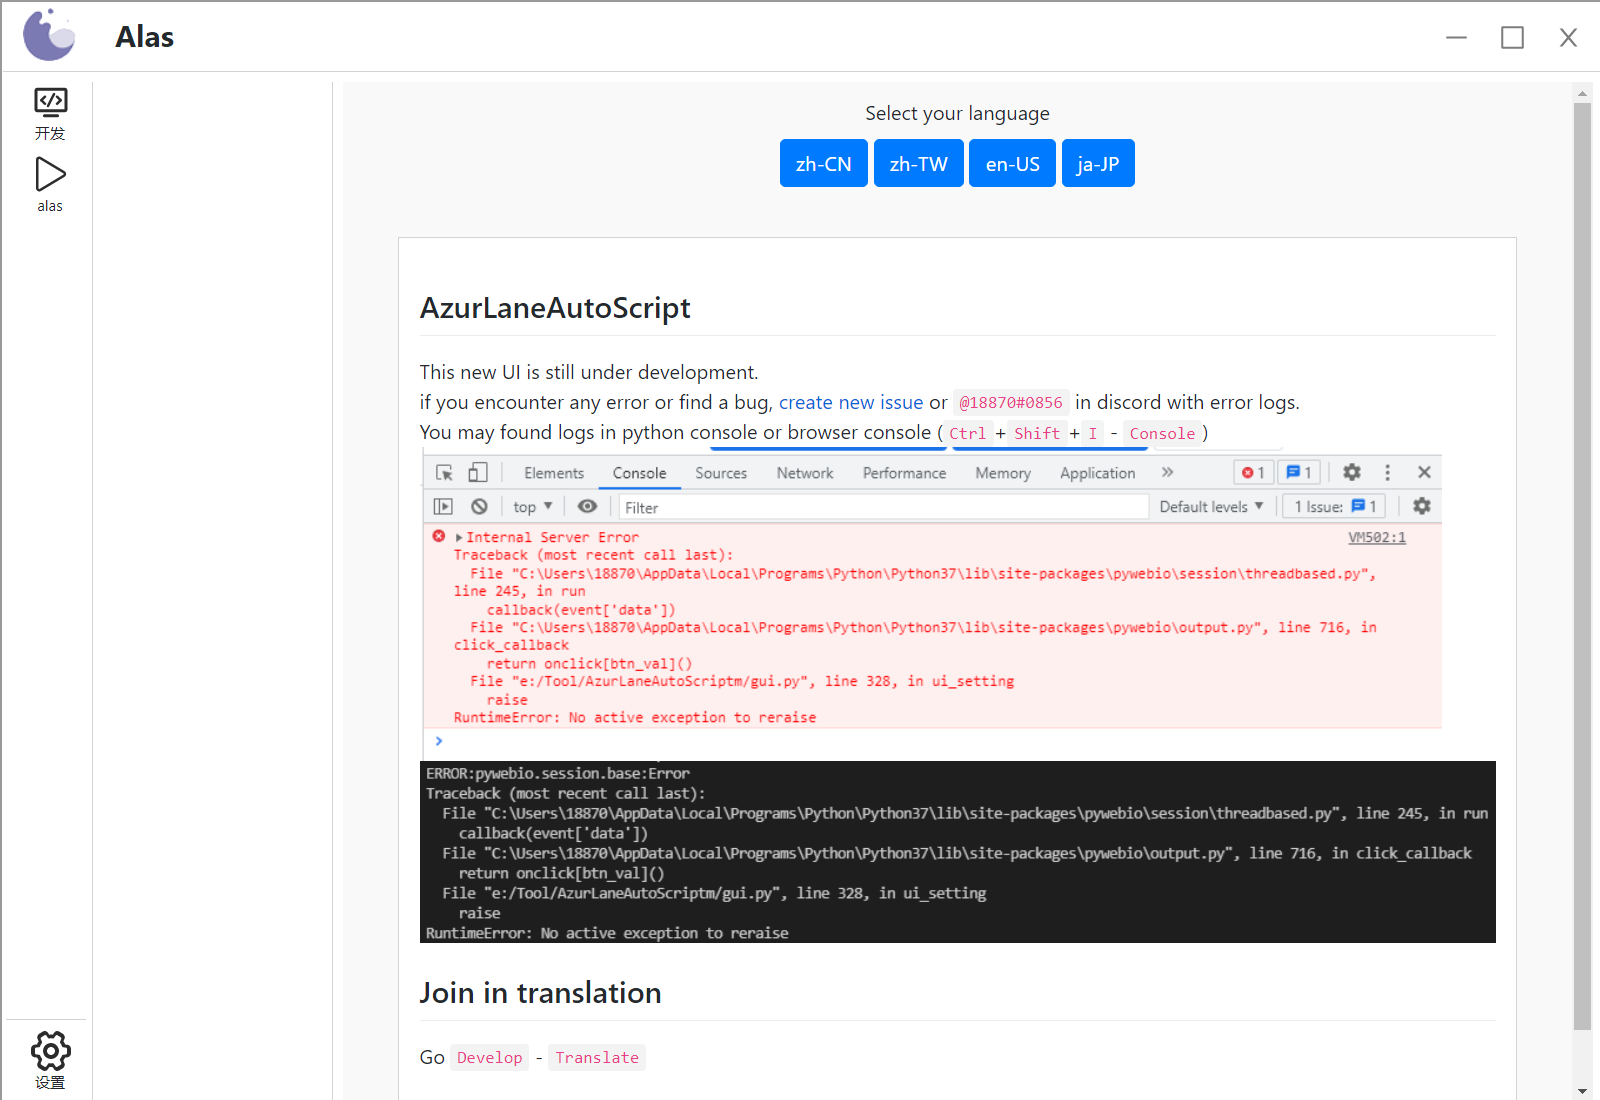
# I got a white screen in Alas

Try
CTRL+Rto refresh and checkout Issue #876 (opens new window).
# Uninstall Alas
Everything in the installer are portable. Just delete them to uninstall. You can also copy an installed Alas to another computer, making use of this feature.
If files are occupied during the delete, open console.bat and try these commands.
adb kill-server
taskkill /f /im alas.exe
taskkill /f /im python.exe
# Start Using Alas
# Configure Emulator
Install an emulator, and have Azur Lane installed.
Goto the settings of your emulator. Set resolution to
1280x720and useTablet Mode.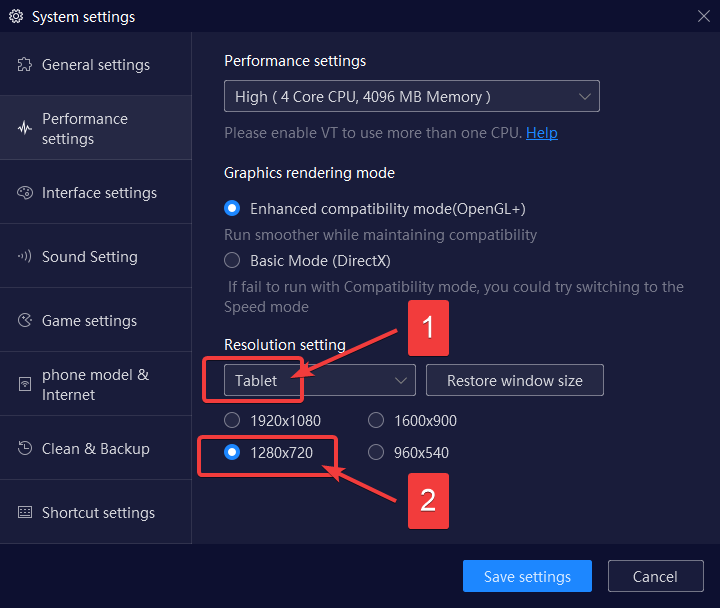
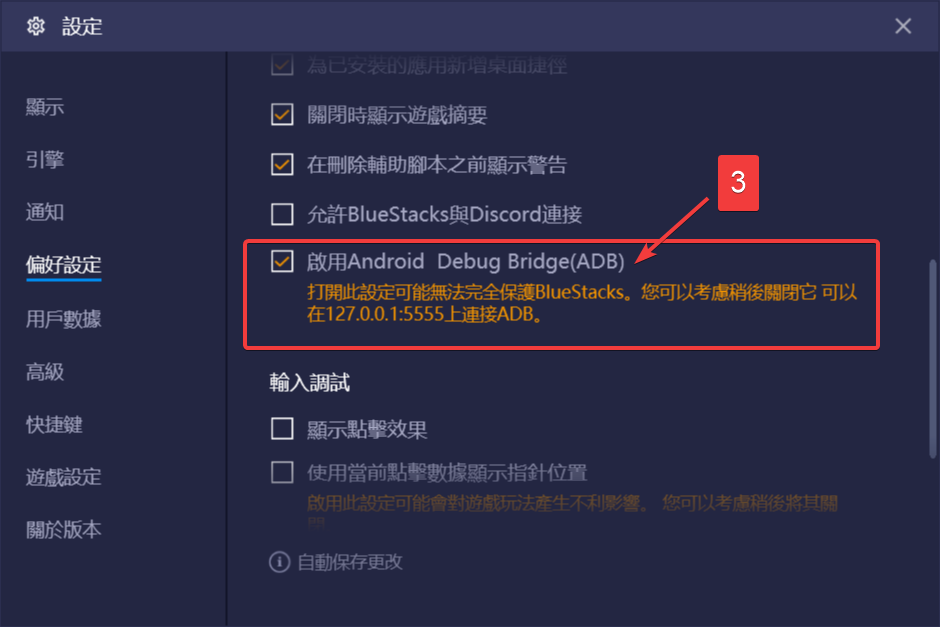
If you are using BlueStacks or LDPlayer, enable ADB too.
# Enter Alas
Double click Alas.exe to start Alas.
When Alas starts, it will update automatically, you don't need to do anything. In most situation, Alas is able to update itself by this way. But if there are big changes on Alas App, you will need to re-download and re-install.
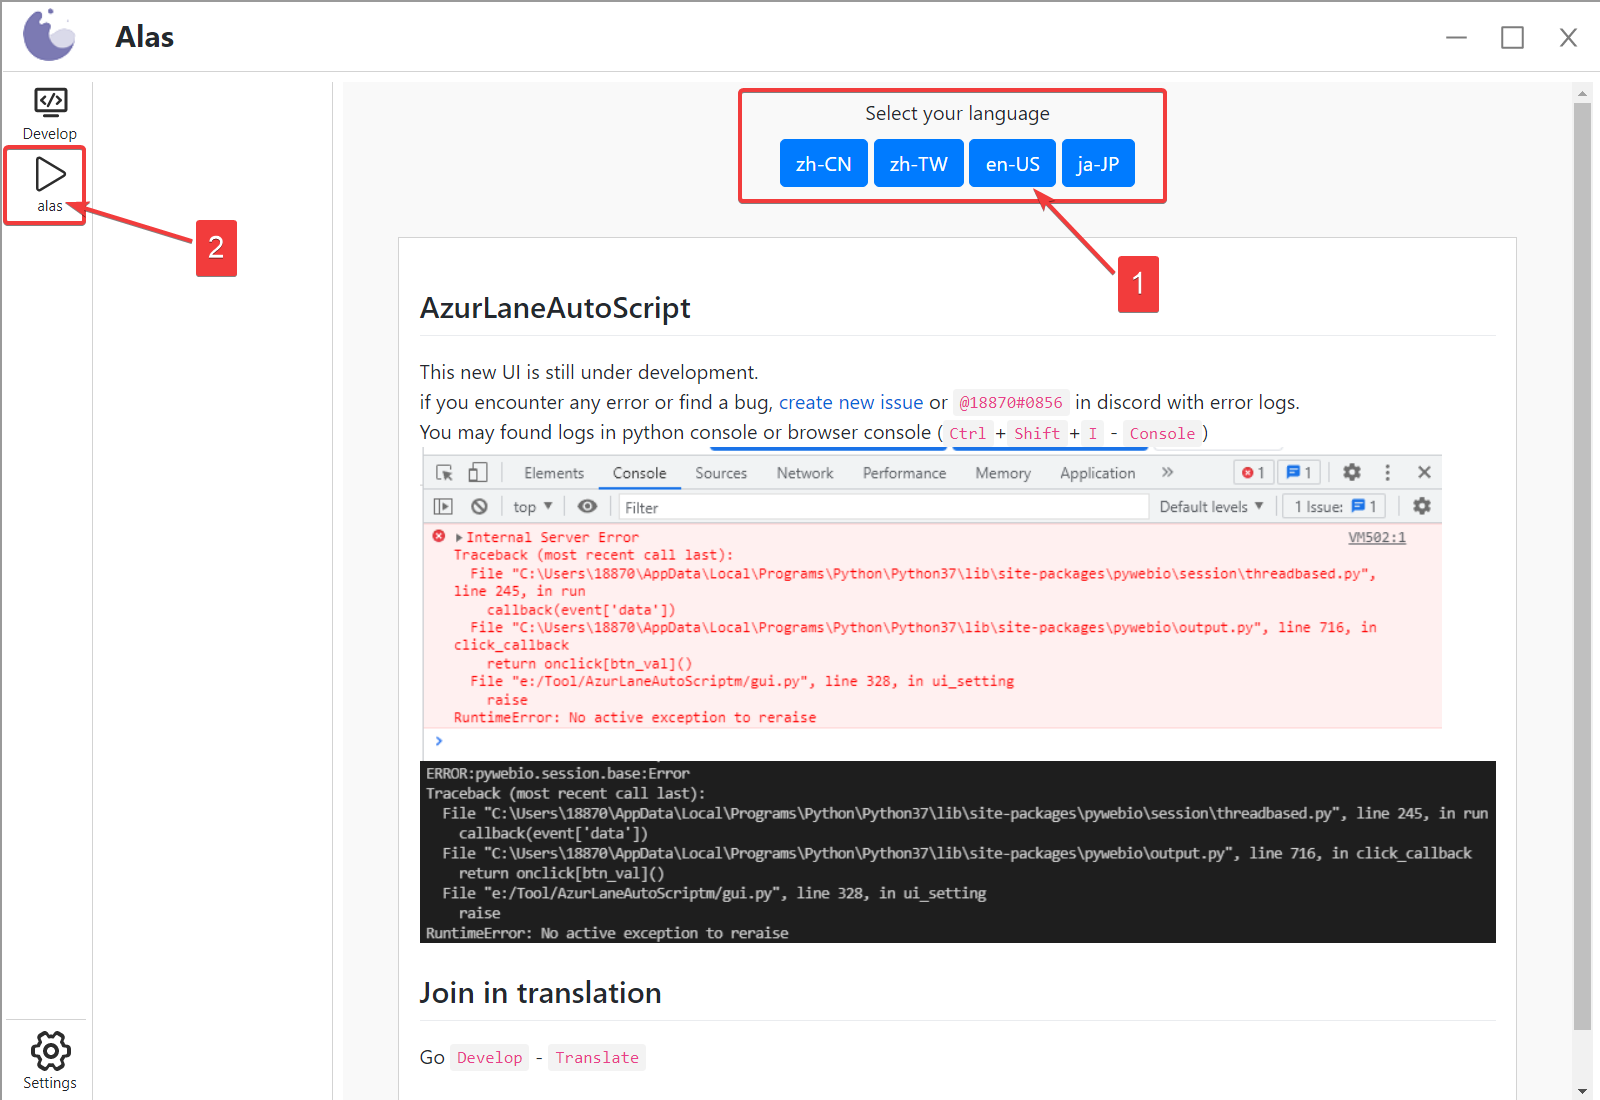
- Choose your language.
- Select your first Alas instance.
# Configure Alas
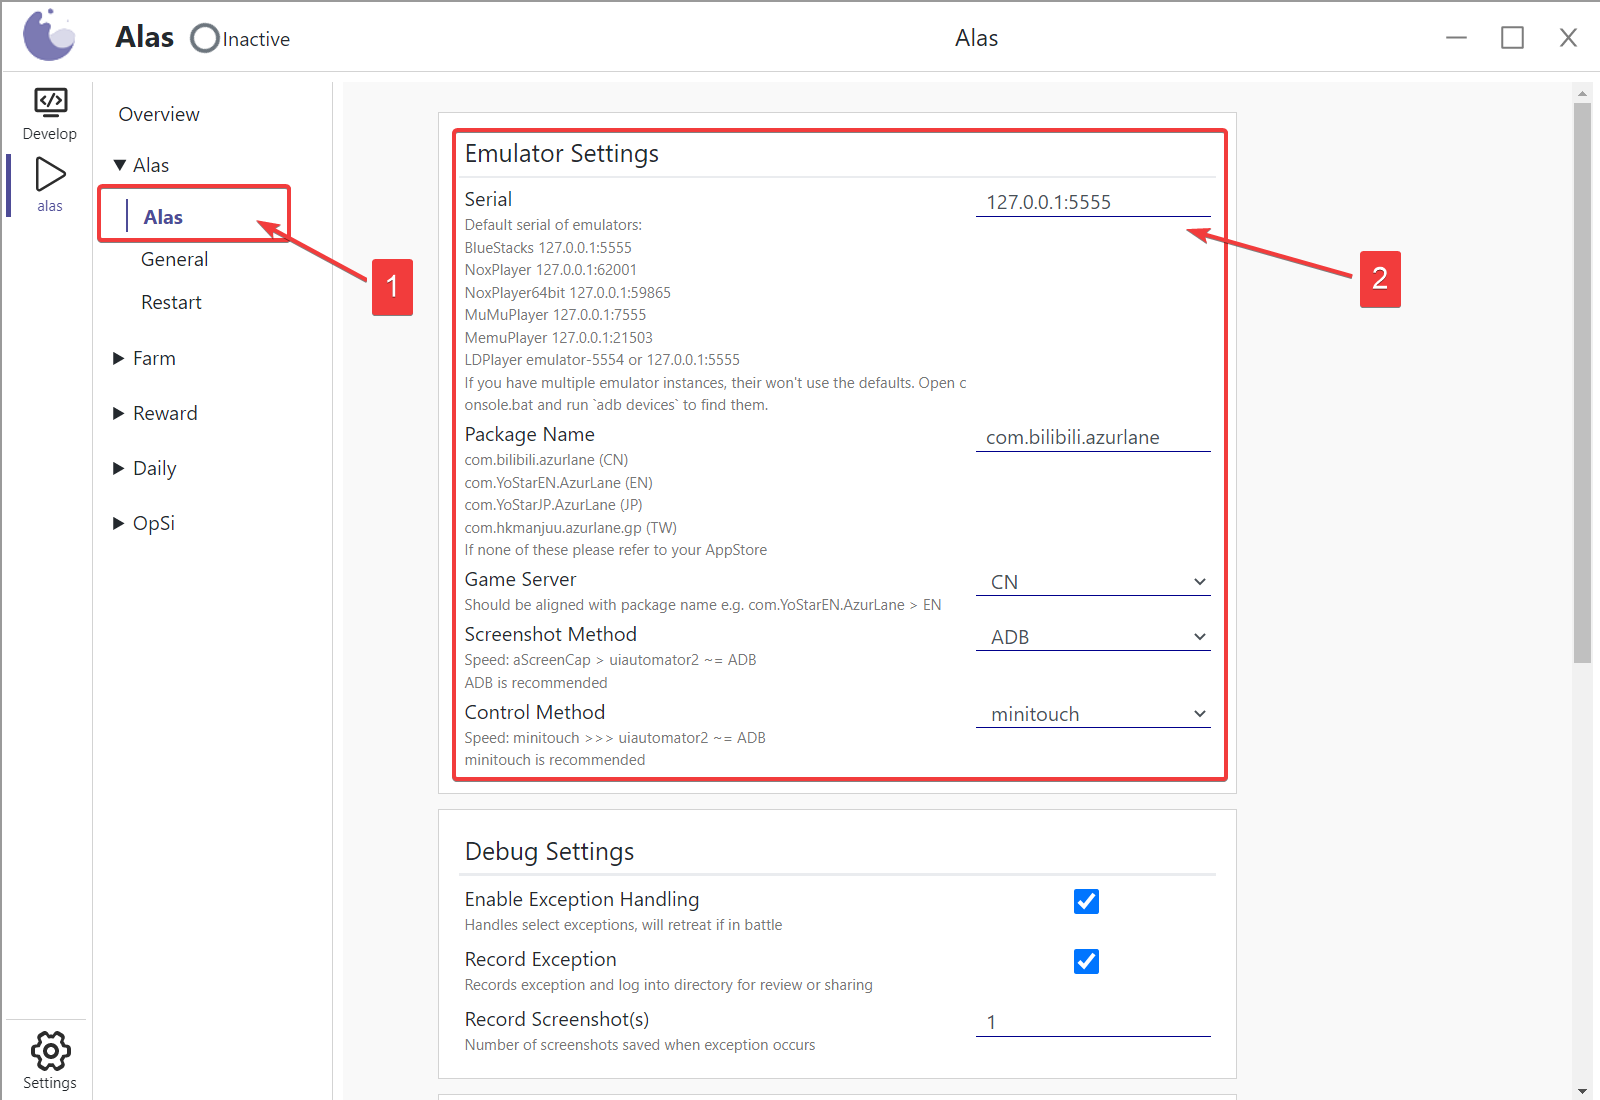
- Enter the
Alason sidebar. - Configure your
Serial,Package NameandGame Server, according to the help text.
# Run Performance Test
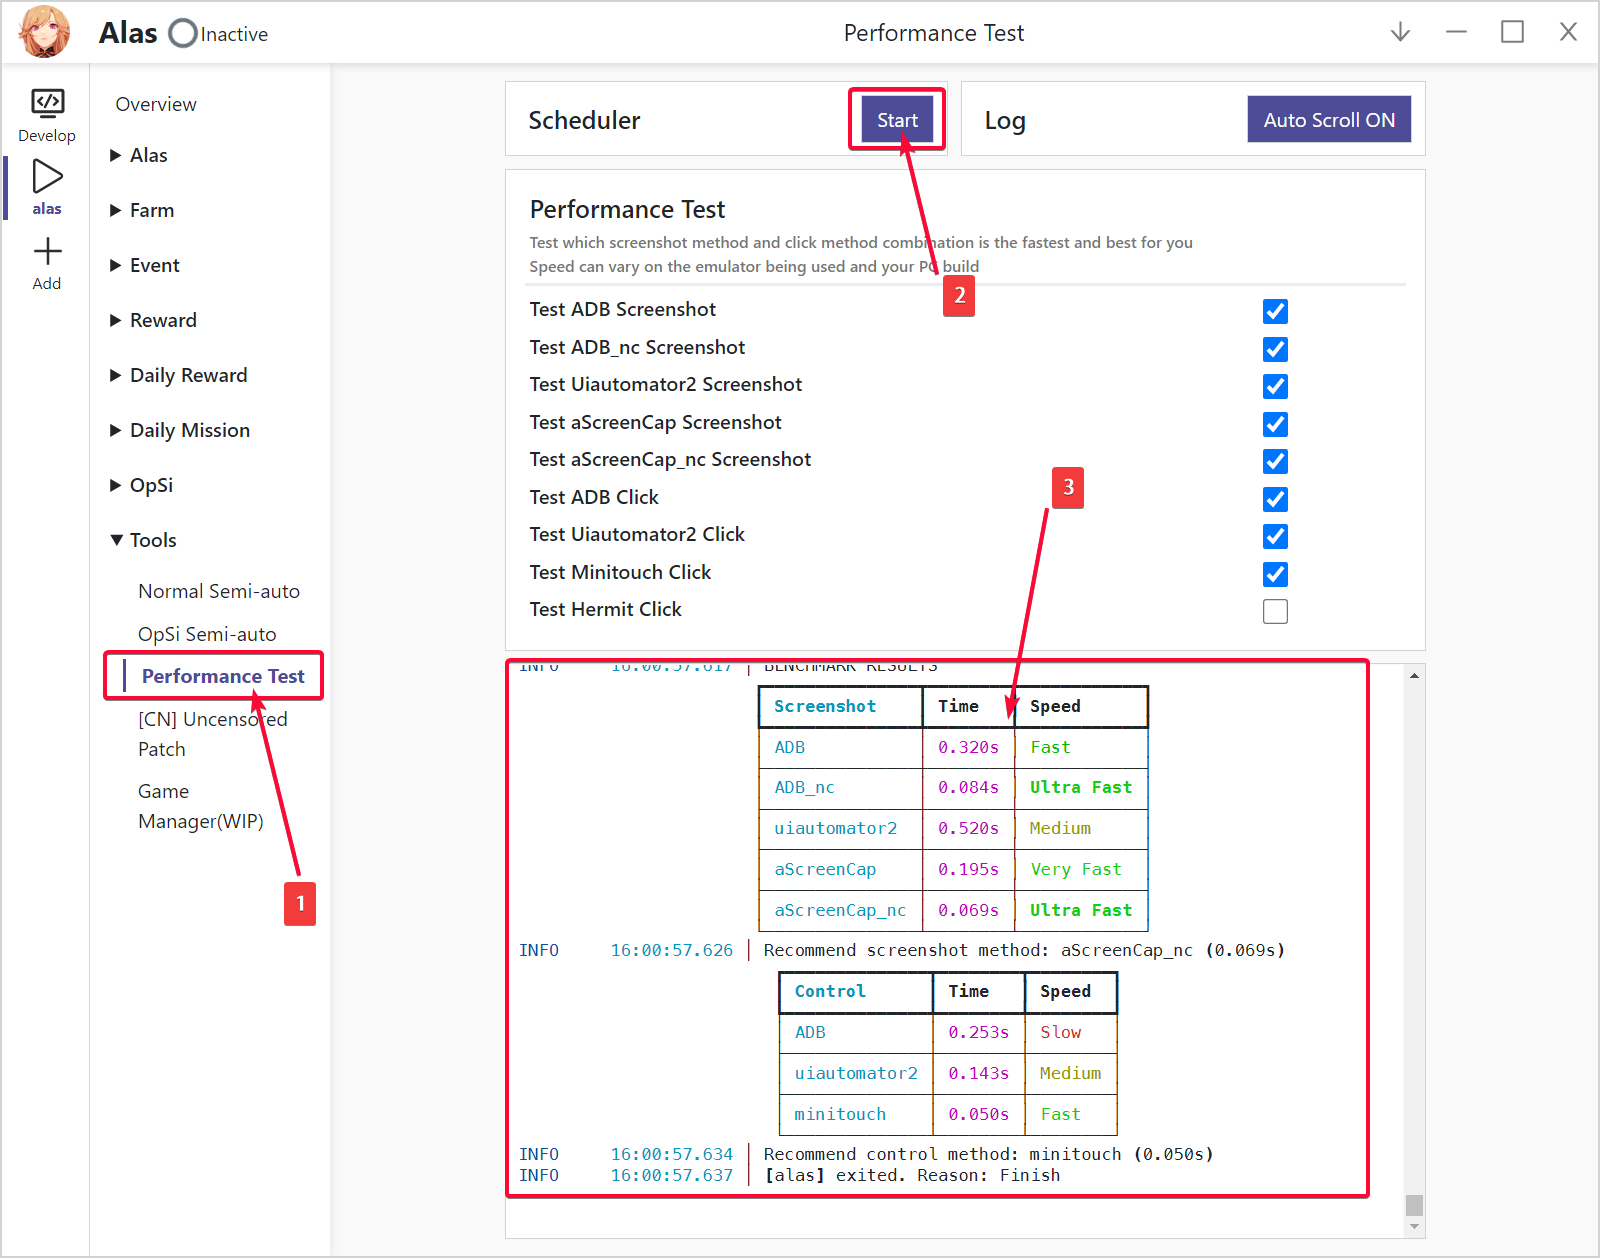
- Enter the
Performance Teston sidebar. Your account needs to unlock W7, before running a performance test. - Keep the default settings, press
Start, wait. - Looking at the results of the performance test, we need to choose the fastest screen shot method and control method. Results can be very depending on PC specs and emulators. In general, screen shot time cost + control time cost < 350 ms is enough for ALAS to run a little faster than human. If you find ALAS slow, you should choose a faster screen shot method or upgrade PC specs.
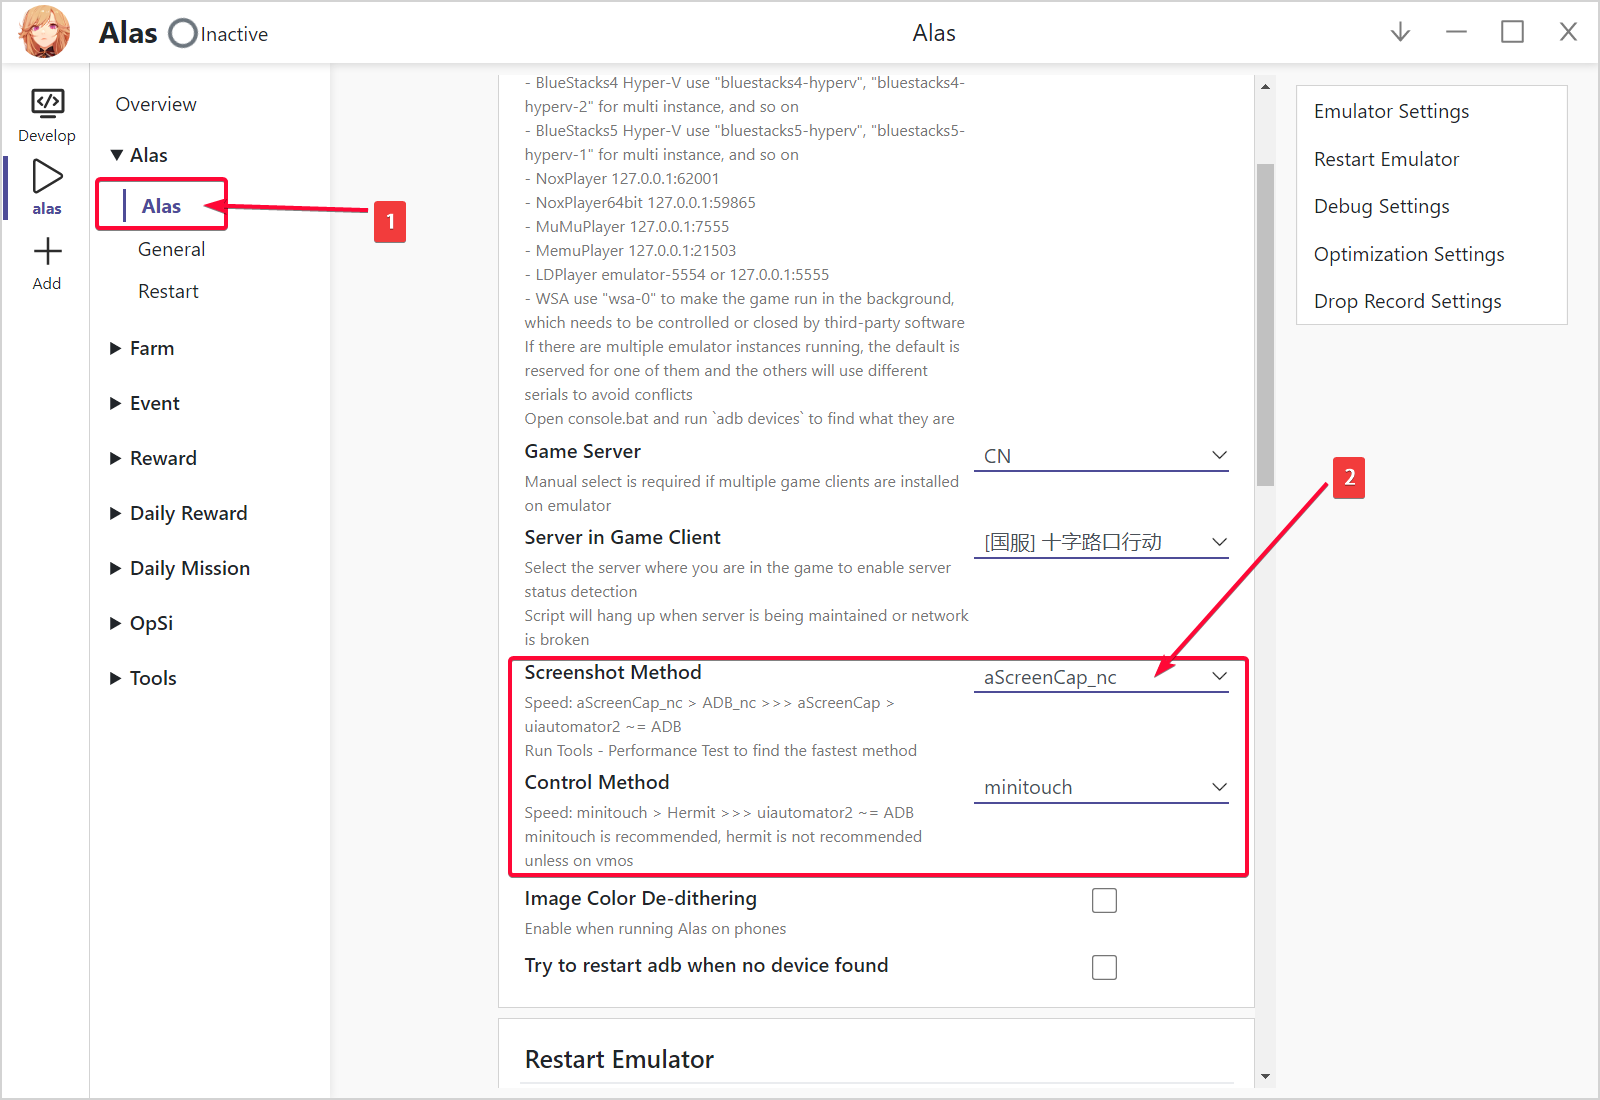
- Enter the
Alason sidebar. - On
Emulator Settingsset the fastest screen shot method and control method.
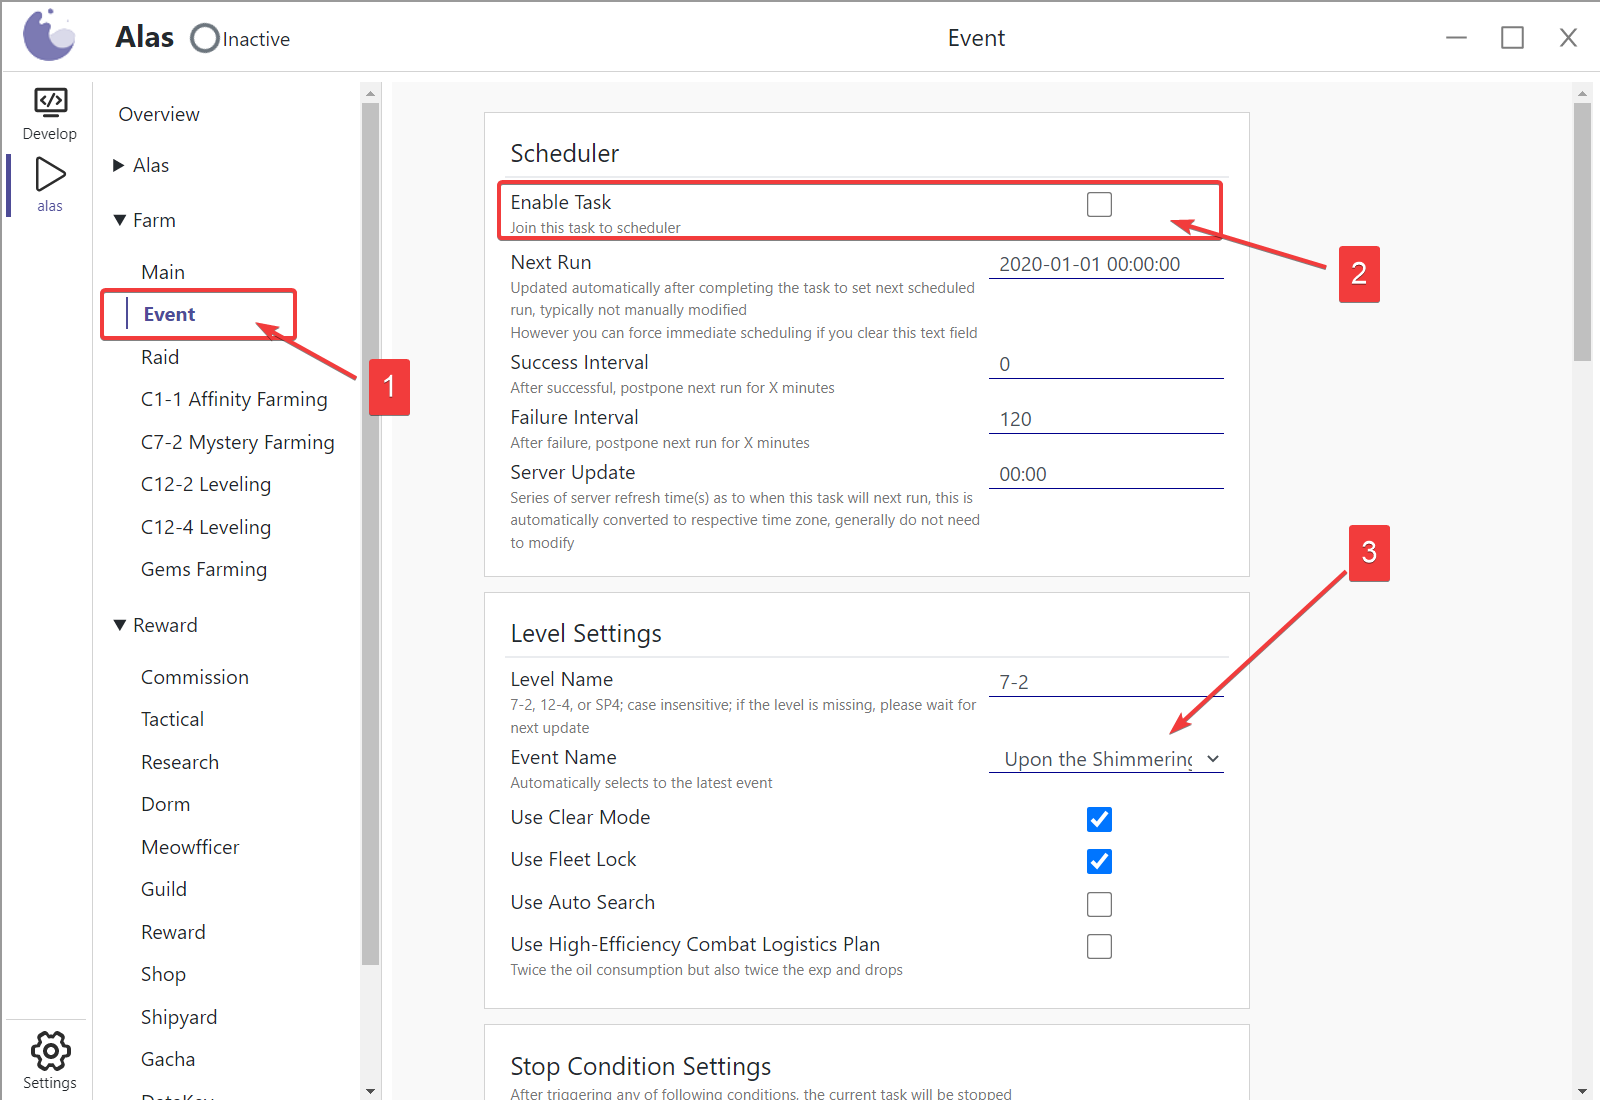
# Enable Tasks
- Choose the task you would like to run. You could have multiple tasks enabled. Alas will schedule them automatically.
- Enable the task.
- Edit the settings below.
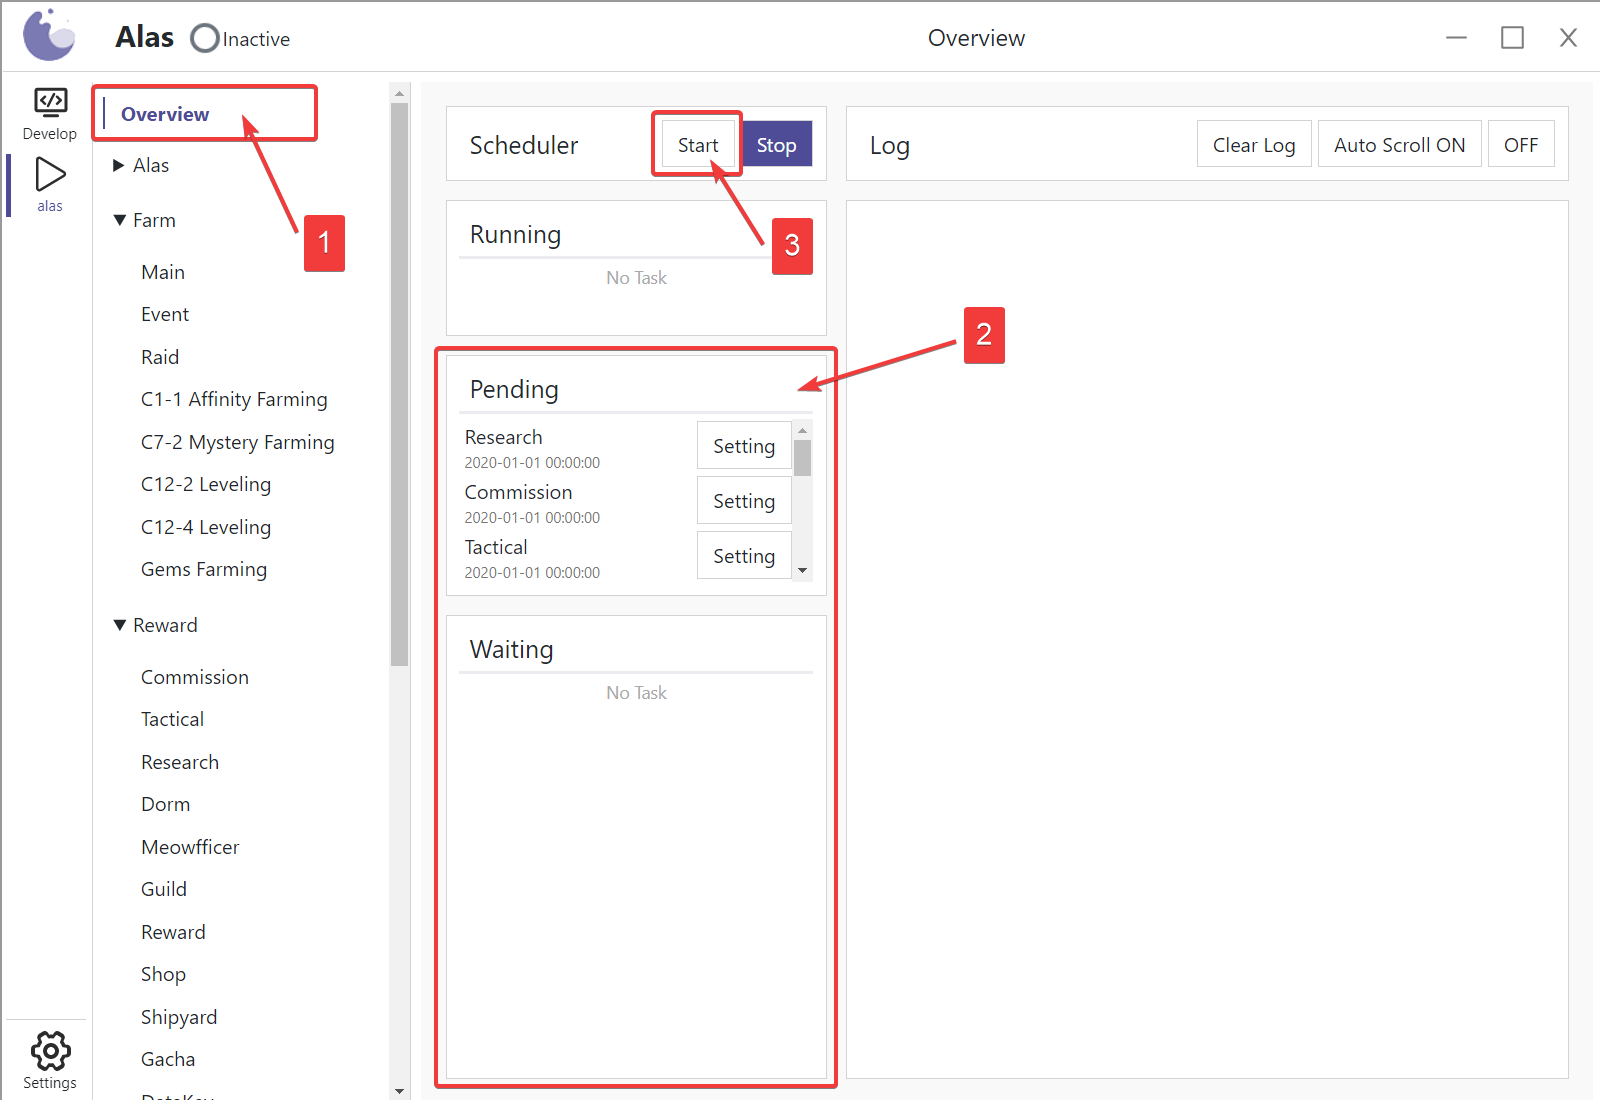
# Start Running
- Goto
Overview. - Tasks you enabled are shown in scheduler queue.
- Click
Start, and Alas scheduler will start running.
# Immigrate from Old Alas App
Before re-installation, find deploy settings config/deploy.yaml and user setting config/alas.json. If you have multiple Alas running, config/*.json are required, such as config/alas2.json.
Copy them to the config folder of new installer, and install as usual.
# Immigrate from Manual Alas Installation
If you are developing or going to develop Alas, you've probably have cloned the repository of Alas, created a virtual environment, installed the dependencies, and deployed ADB. There's no need to install them again.
- Copy the deploy settings
config/deploy.yamlto theconfigfolder of the Alas you've cloned. EditGitExecutable,PythonExecutable,AdbExecutablein it. - Find
toolkit/WebApp/alas.exe, create a shortcut for it. Right click the shortcut, clickProperties, changeStart atto the folder of your Alas clone. - Double click shortcut to run.
Notice: Using the shortcut will bypass the Alas launcher, causing you to manually update Alas. This approach is for developers only.
# Control Alas Remotely via Web
The essence of Alas App or the essence of Electron is Node.js server + Chromium browser. So you will need one of the following ways to start the web server of Alas.
- Open Alas App Client
- Open
console.batand runpython gui.py
And you will be able to access Alas on http://127.0.0.1:{port} , port is 22267 by default.
If you have a static public IP, you can access Alas on http://{ip}:{port} from other devices. If don't you will need a reverse proxy to expose a local server behind a NAT, such as frp (opens new window).
Notice: It's dangerous to expose Alas to the public network. Everyone is able to stop your Alas or edit your settings. What's worse, Alas can't defend injects and attacks.
# Install in Linux with Docker
# Manual Installation Tutorial
Manual installation tutorial is for developers only, requiring basic programing knowledge. If you are not developing nor going to develop Alas, please use easy installer and ignore this part. Mac and Linux users need to install manually too.
# Get Alas
Use Git to clone, do not download from source.
Suppose you are going to install in
D:/AzurLaneAutoScript, then execute this inD:/.
git clone https://github.com/LmeSzinc/AzurLaneAutoScript
2. Enter the directory.
cd AzurLaneAutoScript
# Prepare Environment
Create a new virtual environment instead of an existing one on your computer, because Alas is using old Python and dependencies. Let's take Anaconda as an example to create a virtual environment. Of course, you could use others like venv.
- Create a virtual environment named
alas(Any other name is OK). Python version must be 3.7.6. To avoid troubles, don't use 3.8 or higher.
conda create -n alas python==3.7.6 -y
- Activate the environment you have just created.
conda activate alas
- Install dependencies.
pip install -r D:\AzurLaneAutoScript\requirements.txt
If pip says it need to be updated, like this.
WARNING: You are using pip version 21.0.1; however, version 21.1.3 is available.Execute this, or just ignore.
python -m pip install --upgrade pip
If you failed to install
Python-LevenshteinbecauseMicrosoft Visual C++ 14.0 is required, download its wheel file here (opens new window) and install.pip install python_Levenshtein-0.12.0-cp37-cp37m-win_amd64.whl
# Prepare Emulator
Install an emulator, and have Azur Lane installed.
Goto the settings of your emulator. Set resolution to
1280x720and useTablet Mode.If you are using BlueStacks or LDPlayer, enable ADB too.
Get ADB.
Get the latest ADB here (opens new window), set it in your environ variables.
Replace the ADB of emulator
Different version of ADB will kill each other when starting. Chinese emulators (NoxPlayer, LDPlayer, MemuPlayer, MuMuPlayer) use their own adb, instead of the one in system PATH, so when they start they kill the adb.exe Alas is using.
Replace the ADB in your emulator with the latest one.
Take NoxPlayer as an example. There are 2 ADB in nox install folder,
adb.exeandnox_adb.exe. Make backups for these 2 files and delete them. Copy twoadb.exeto your nox install folder, and rename them toadb.exeandnox_adb.exe.After that, run this command to test.
adb devices
If you see output like this, it means the replacement success.
List of devices attached
127.0.0.1:59865 device
If you have output like this, it means the replacement failed. There may be files that haven't been replaced.
adb server version (36) doesn't match this client (41); killing...
- Install uiautomator2 (opens new window), an auto-testing library. Before installation, open your emulator.
python -m uiautomator2 init
After the installation, there will be an app called ATX on your emulator.
# Run Alas
- Activate virtual environment and execute:
python gui.py
Then Alas is available on http://127.0.0.1:{port}. Port is default to 22267.
- Configure Alas, referring to "Start Using Alas" part.
# Use Alas Desktop App
Desktop App cross-platform, can be build in Windows, Mac and Linux.
- Enter
webappdirectory, install the dependencies.
yarn
- Build Desktop App.
yarn run compile
Then, desktop app will be available in webapp/dist/{platform}.
- Start using it. Create a short cut, referring to "Immigrate from Manual Alas Installation" part.