# Quick guide
# Requirements
- A good PC (Older or underpowered PCs may have problems running the emulator correctly)
- Python (opens new window) installed and added to PATH (is highly recommended 3.7.6 64bit version only)
- Latest ADB (opens new window) added to PATH.
- I don't know how to add to PATH (opens new window)
- The use of a virtual environment (venv) in python is highly recommended
- ADB debugging enabled and emulator with 1280x720 resolution
- Read the entire guide before asking any questions.
# New automatic installation method (Recommended)
- Video tutorial (opens new window)
- Download the zip AzurLaneAutoScript.zip (opens new window) (right-click, save)
- Extract and run Easy_Install-V2.bat (ex.
C:\, orD:\, any will work). The installer will create the nessesary folders. - Do not run the installer in a folder that contains spaces in the name, this will make the scripts not work correctly, create a folder at the root of some drive like
C:\ALAS\orD:\ALAS\, then place Easy_Install-V2.bat in that folder and run if you must run it inside of a folder. - To Run ALAS, just click in
alas.batinside the installation folder and follow the instructions located below in theHow to use Usesection. - To avoid connection errors it's recommended to configure your emulator port correctly, in
alas.batfirst start will be prompt to enter your HOST:PORT, below you have more information on how to find your emulator PORT, READ ALL.
# Manual installation method (Not Recommended)
# How to create e python virtual environment
First install Python (opens new window)
Create a folder where you will put the virtual environment, I recommend creating a folder
venvin the project's root directoryGo to project root in command line
type
python -m venv path_to_your_folder\venv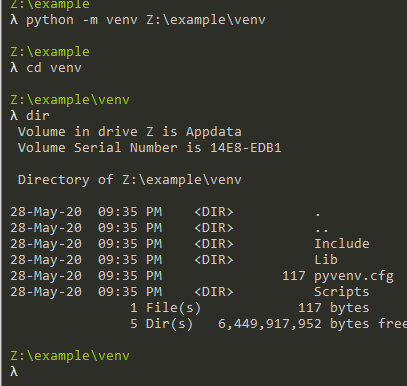
You can see that now python has created some folders and files in the venv folder, it has created a completely clean virtual environment, thus preventing any conflicts.
Now, it is necessary to activate the virtual environment in command line, go to project root (the same where you have the file alas.py) and type
.\venv\scripts\activate.bat
Look that a
(venv), with that we know that we are in a virtual environment.If you type
pip listshould get this output:
Now, you can proceed with the installation of the requirements through
pip install -r requirements.txt
# Installation
Clone this repository
Install the requirements.txt (
pip install -r requirements.txt)Install an android emulator (Tested on BlueStacks)
The android emulator resolution must be set to
1280x720Test if the ADB is working correctly
adb devicesThe output must be something like this

Test if your Python is working correctly
python --version
Install uiautomator2
uiautomator2, is an automated test library that can speed up screenshots and clicks. You can also use ADB to perform screenshots and clicks, but it is a slower way.
For performance optimization, it is recommended to use ADB screenshots, uiautomat2 screenshot slightly faster than adb screenshot, but cpu consumption double.
Perform
python -m uiautomator2 initThe output must be something like this:
 (in this case, I had already installed)
Check if uiautomator2 was installed successfully
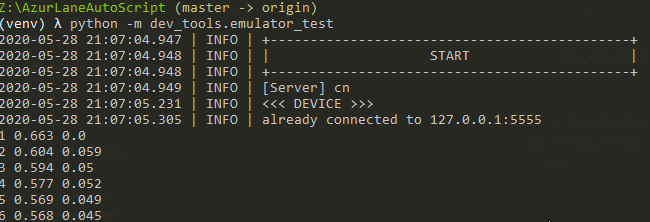
Modify the serial in \dev_tools\emulator_test.py line 31 and, execute from root project directory (the same where you have the file alas.py)
python -m dev_tools.emulator_test
The output must be something like this:
The default serial for some emulators:
| Android Emulator | serial |
|---|---|
| NoxPlayer | 127.0.0.1:62001 |
| MuMuPlayer | 127.0.0.1:7555 |
| Bluestacks | 127.0.0.1:5555 |
| LDPlayer | emulator-5554 |
You can check a new app installed in your emulator:

If you open up can check if are running:
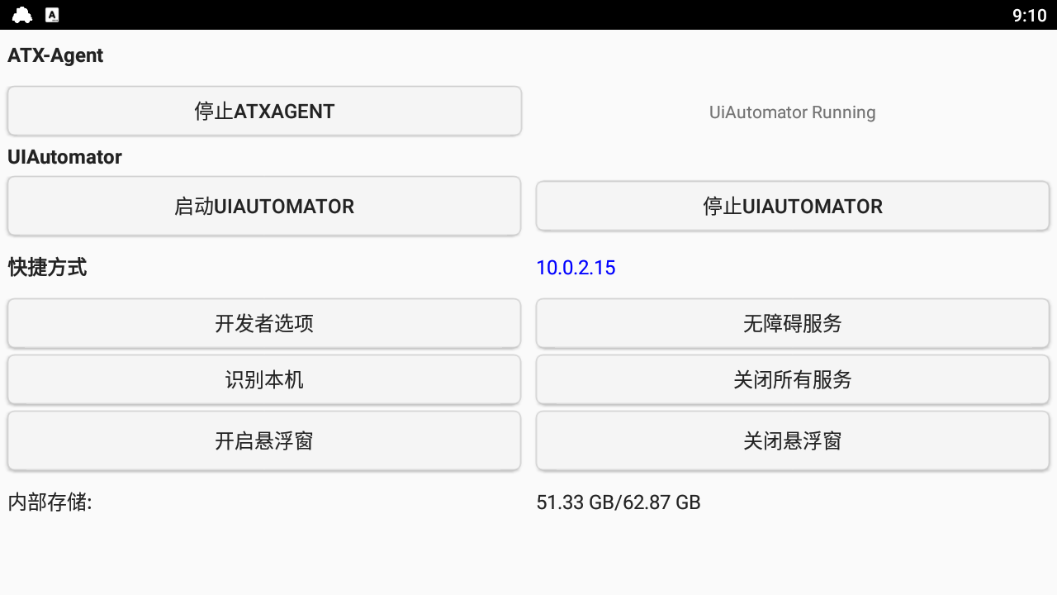
If are not running, you cannot use U2 and will get error.
# How to use Use
If you installed with Easy_Install-V2.bat you can just double-click alas.bat located in your AzurLaneAutoScript folder. It will ask you for your emulator connection information (located in the table above). Once you've entered the serial information, choose your preferred language.
If not you can call py alas_en.pyw from command line to open the GUI
Multi-usage: copy alas_en.pyw, and rename, double-click run on it. The settings of template.ini are copied when the first run runs. The script runtime uses the ini profile of the same name.